Elf on the Shelf

Last year, we decided to jump on the elf on the shelf bandwagon.  We watched the cartoon, I was intrigued, saw the price in stores, and after nearly fainting, looked online and got a good deal on our very own elf.

I love the vintage look of the elf.  I can remember going to my grandma’s house at Christmas time, my mom’s mother, and admiring all the beautiful vintage ornaments, including an elf that looked very much like the widely popular, hugely overpriced elf on the shelf.  That memory alone made me decide to pay more than was reasonable, and I know we are making awesome memories for the kids.

Much like the cartoon, Matthew was uninterested in the elf, but Isabella was in love!  She named our elf Cookie, and so began the adventure of finding him every morning.  There are some pretty awesome elves out there, doing awesome things as can be seen on Pinterest.  There are also some awfully naughty elves that seem to be doing rotten things, stuff that would surely put them on Santa’s naughty list!

Cookie never does anything naughty, he likes to play with the kids toys and occasionally leave them a tiny elf sized letter.  Isabella whispers in his ear sometimes, telling him that she loves him and to tell Santa that she said “hi”.  Doesn’t that just melt your heart?

This year, Noah is in on the game, and runs out of room each morning yelling, “Where’s Cookie?!”  Yup, definitely worth the money for a tradition that will be passed down and enjoyed for many years.

elf1

Cookie’s first day back!  He is holding a tiny mug of hot cocoa and has a tiny plate of cookies next to him.  Kind of adorable, I know.  Thanks for sharing, Barbie!

elf2

Chillin’ on Santa’s lap.

elf3

Getting in on the countdown calendar fun!

Felt Christmas Tree

If you have ever even casually peeked at Pinterest, I’m sure you have seen the cute little felt trees that some genius mama made for her kids to play with.  While the idea is to give them their very own tree and ornaments to decorate and thusly stay away from the real tree, I can tell you that while the tree is cute and fun, even for the older kids, it’s just not the same as the real one with the sparkly lights and dangling goodies.

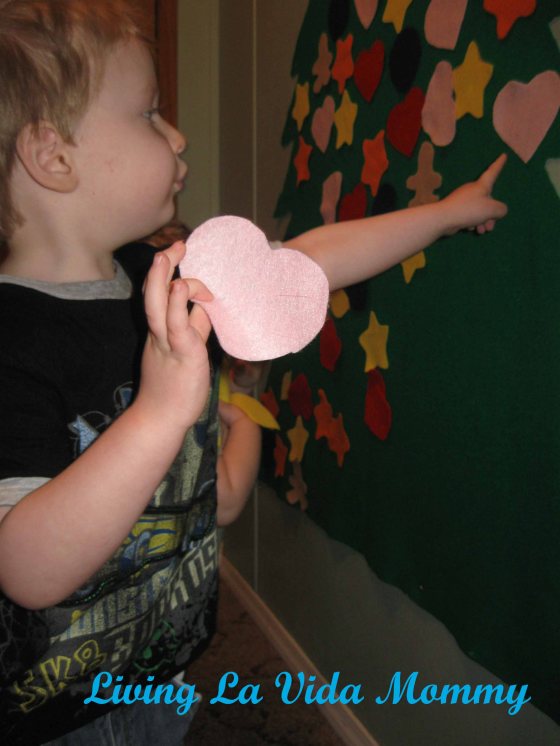
That said, we made the tree and I kind of love it.  It is way bigger than I intended, but it turned out cute and the babies love it.  Sara likes to take the dump truck, drive it to the felt tree, remove all the ornaments, placing them in the dump truck and then she drives it around the whole house, squealing with joy.

It is pretty simple to make, just cut a Christmas tree shape out of felt and then ornament shapes out of felt.  I used some cookie cutters for some of the ornaments and others I just free handed.  There is no special trick to sticking the ornaments to the tree.  Felt sticks to felt.  It’s just that easy, trust and believe.  Now, hanging the tree on the wall was another story.  I originally intended on putting it on our metal front door with a few dabs of hot glue.  The glue wouldn’t hurt the metal, and I knew it would be secure.  Then I made the tree about four times bigger than intended and it wouldn’t fit on the door, so I had to think of a plan b.

ftree1

ftree2

I considered using velcro, Command strips makes them with that adhesive that won’t damage walls.  Ultimately, I decided on flat thumb tacks because I knew that it would get roughly handled by the kids and I did not want to pick the tree up off the floor 900 times a day.

So far, so good!  The kids play with it every day and it hasn’t fallen down once.  The ornaments get crumpled up and slobbered on and they still stick just fine to the tree.

ftree3

ftree4

I haz all the ornaments, muahahahaha!

Pinterest Made Me Do It

Okay, so, I saw a similar, adorable idea for a new way to make a hand print turkey with the kids on Pinterest and decided that I had to do it.  My original plan was to do it with both Noah and Sara, my 3 year old and 1 year old.  Yeah, I has the crazy.

While I was happily crafting with Noah, Sara was destroying the house.  Emptying book shelves, screaming, crying, all in all, just being a butt.  It was around the time I got a face pat from a tiny hand covered in paint that I realized the insanity of the situation and came to my senses.  We finished Noah’s turkey, but Sara?  Yeah, maybe next year.  The novelty has officially worn off.

Here are the pictures of our craft.  I think it turned out super adorable, regardless of the mess.

We started with a plain piece of paper and four different colors of paint.  Technically, I only had red, green and yellow, so that orange is custom made using my amazing kindergarten acquired color mixing skillz.  Impressive, I know.

The Noah smiles get weirder, just wait.

Basically, you paint the kiddos hand and plop it on the paper.

You are going for a fan shape, the hand prints are going to be the turkey feathers.

Yes, that’s the face he makes when we tell him to smile.  Well, it’s the most normal of the faces he makes when we ask him to smile.

After the hand prints are all in place, wait for them to dry before adding the embellishments.  I used scrap book paper and a paper bag for the body and head and I actually cut the feet, beak, and gobbler out of the ads we used for our drop sheets.  I’m a handy girl, what can I say?  We had the googly eyes on hand, but I think you could cut them out too.

How cute, right?  I added his name and the year, and I *hope* to tackle this again next year.  It’s not hard at all, it’s quick, but it is messy and near impossible to do by yourself with more than one little bit running around.  Just sayin’.

Family Tree

I love any craft or project that uses hand prints, feet prints, etc because it is a constant reminder of how tiny the kids hands and feet were at one time.  Dirty hand prints and feet prints smudged around the house don’t count.  It’s not the same.

While perusing Pinterest, I came across several similar projects that utilize the entire family’s hand prints.  I decided that our home required one, and thusly, a craft was born.

I started with a large piece of poster board.  The one I got was actually more like nice paper, a creamy color, but it was found at Michaels by the poster board and it was less than a dollar.  With my favorite chocolate brown paint, I painted a tree trunk and branches.

Are you in awe with my tree making skillz?  Me neither, but it will work.  Trust me.  It’s just going to look dumb until the leaves are in place.  Now, for the leaves, we are using hand prints!  I bought several colors of Martha Stewart Craft paints that coordinated to use as the leaves.  You can choose any colors you like.  I wanted something light and able to be used year round so I chose lighter colors, but again, use whatever colors you like.

It’s a jazz hands tree!  Those are rare, you know.  For the hand prints, you are going to want to slather the paint on the hands pretty thickly.  Like, a lot more than you would think.  Really glop it on.  The kids loved it, and it washes off very easily.

I was worried how the little kids hands would turn out.  Slapping paint on a 2 year old and at the time a 9 month old…..well, it seemed like a recipe for disaster.  I definitely needed help.  Abe held on to the kid and I used their little hand as a squirmy little stamp.  Surprisingly, they turned out really well!  I think I got lucky.  It could have easily gone awry at any moment.  It’s not a hard craft, so it could be done again if need be, but that could get annoying.

To finish off the family tree, I used lettering and then I framed it in a large frame I used a 40% coupon on at Michaels.

I love it!  I think it turned out adorable, and I love being able to look at the tree and see how small the kids hands were.  It can also be easily added to.  Heck, I even know what paint colors I want to use for the next hand prints we will be adding.  No, not an announcement.  But the tree could definitely use a few more “leaves”.


Glitter Keys

Oh glitter, how I love thee!  I think everything can be made better with a little (or a lot) of glitter.  Another nifty thing I stumbled upon while browsing Pinterest, glitter keys.  I fell in love with the idea immediately and glittered my keys the very same day.

My front door and back door locks look identical, but are actually different keys.  It was a daily annoyance of mine, fumbling with them, trying to find the correct key whilst holding a wiggly baby and keeping track of the other kiddos.  I had bought one of those nifty key covers you always see that just slide over your key, supposedly allowing you to easily identify your key and use it at the same time.  Fail.  For my keys anyway.  There is no play room at the top of the key for the thing to sit on without covering the functional part of the key, so while I could quickly identify my key, it was then a five minute battle trying to use said key.

Glittered keys will not disappoint.  They are awesome.

Here’s what you need:

*Keys that you wish to make awesome

*Rubbing Alcohol

*Glitter (different colors to help differentiate between your keys)

*Paper plate or dish to work over to save your excess glitter (waste not want not)

*Paint Brush

*Clear Finger Nail Polish

*Mod Podge (Say it with me people, Mod Podge, not Modge Podge.  Let’s save the world from incorrectly pronouncing our favorite craft staple.)

Okay, here’s how easy peasy this project is.  First, wipe your keys with the alcohol, getting them nice and clean and free of any oils that may make the Mod Podge not adhere well.  Apply a nice layer of Mod Podge to the top of your key.  I went ahead and did both side at the same time.  Don’t forget to get the sides of the key as well.

Once coated, sprinkle the glitter on top, covering all the white areas.  Lay it on thick.  remember, the plate will catch all the excess and you can reuse it, so its not being wasteful to really pile it on.

Then I rest the key on the paper plate to dry while I repeat the steps on the next key.

Let the keys chill out and dry a bit, and then you will re coat them with Mod Podge and one more good, healthy dose of glitter.  Remember, you can never, and I mean never, have too much glitter.  Tap the excess glitter off between coats.

The last step, once the keys are dry, is to coat them with the clear fingernail polish.  This protects the keys and keeps the glitter from rubbing off, making you look like you were attacked by pixie dust.

I think I did about three coats of polish.  You will be able to tell by the look of the key when you have enough, because they will look dull when they have sucked up all the polish and need more.  Once they are good and coated and shiny, then they are complete.

Aren’t they perty?  I love them.  Just seeing my glittered keys makes me smile.  Hey, I’m easily amused!  I offered to glitter Abe’s keys, but he declined my awesomeness.  He is the official Party Pooper of the house.